Jitsi Meet, a free and secure video conferencing platform, offers a powerful feature: breakout rooms. These virtual spaces allow you to divide your meeting participants into smaller groups for focused discussions, brainstorming sessions, or collaborative work.
This guide will equip you with the knowledge to create, manage, and navigate breakout rooms in Jitsi Meet, transforming your online meetings into productive and engaging experiences.


Creating Breakout Rooms in Jitsi
Only moderators (the first person to join the meeting) can create breakout rooms. Here’s a step-by-step guide:
- Start your Jitsi meeting.
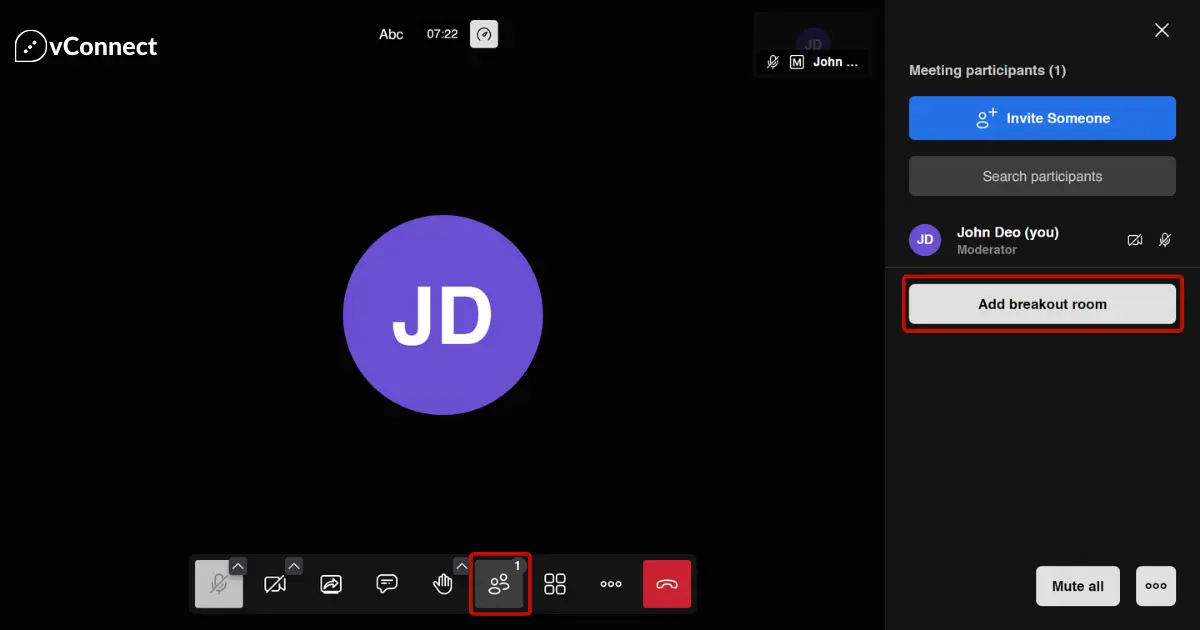
- Access the participants list. Look for the “Participants” icon (usually a silhouette of multiple people) in the bottom menu bar and click on it.
- Create your breakout rooms. Click on “Add breakout room” to create a breakout room named “Breakout Room 1” by default. You can add more rooms as needed and rename them for clarity (e.g., “Brainstorming Room,” “Group Discussion 2”).
Assigning Participants (Optional):
Jitsi allows you to assign participants to specific breakout rooms manually. Here’s how:
- Click on the name of a participant in the list.
- A pop-up menu will appear. Select the breakout room you want to assign them to.
Letting Participants Choose (Optional):
If you prefer, you can allow participants to choose their own breakout rooms. Jitsi will automatically generate a “Join” button next to each room name. Participants can simply click on the desired room to join.
Managing Breakout Rooms
As a moderator, you have complete control over breakout rooms:
- Join any breakout room: Click on the room name to enter it and participate in the discussion.
- Close a breakout room: Click on the three dots next to the room name and select “Close room.” Participants in that room will be sent back to the main meeting.
- Remove an empty breakout room: Click on the three dots next to the room name and select “Remove room” to eliminate it from the list.
Step 4: Bringing Everyone Back Together
When your breakout session is complete, you can bring everyone back to the main meeting room in two ways:
- Announce the end of the breakout session: Inform participants in the main room and breakout rooms that it’s time to return.
- Close all breakout rooms at once: As a moderator, you can close all breakout rooms simultaneously, automatically sending everyone back to the main meeting.
Conclusion
Jitsi breakout rooms provide a valuable tool for enhancing your online meetings. By following this guide, you can leverage this feature to create focused discussions, foster collaboration, and keep your meetings productive and engaging.
FAQ
Currently, Jitsi allows participants to move freely between breakout rooms without restriction.
Jitsi doesn't offer a built-in timer for breakout rooms. Still, you can use a separate timer app or extension to manage your breakout session duration.
Yes! All the standard Jitsi meeting features, including screen sharing and file sharing, are available within breakout rooms.
Jitsi allows you to create a maximum of 75 breakout rooms per meeting. However, the actual number may be limited by factors such as your internet connection and the capabilities of your device.
Yes, breakout rooms are supported in the Jitsi mobile apps for both iOS and Android devices. Participants can join and participate in breakout sessions from their smartphones or tablets seamlessly.


